

1. FOLLOW THE reference structure


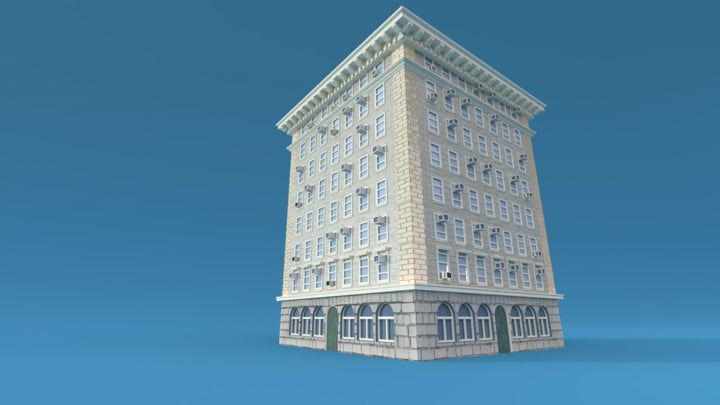
My reference is a precinct from my favorite tv series called Brooklyn nine-nine.
To gain a better understanding of procedural concepts and to ensure that my building could adjust its dimensions accurately, I began by constructing a basic block using expressions and procedural modeling.


Using copy with Stamp to determine the window size, the gap. Remember to -1 to avoid the window overlap the door.


Using the same copy Stamp node to create the second additional Floor. And using the Transform node to set the window to be in front of the wall.


I also used the blast node to isolate the window, and then used add node to create the point. Then, I can use copytopoints to attach the shelters. (Console using the same method)


For the air conditioner, the beginning process is similar to the way I build the shelter. Next, I used the Fuse SOP to snap points together. Next, use attribute randomize to set the distribution to 'two values' (show black and white points ). Using delete node to delete the white node.


@Cd. r > 0.1
Meaning RGB pass. If color more than .1, it will leave black pint only.


Using attribute randomize to set the distribution to 'two values' again. Create to delete node, one node set the operation to Delete Non-Selected to isolate the black points. The other delete node set the operation to Delete Selected to isolate the white points. Each of them connects each copytopoints node to have two different position air conditions. I also used the null node to get a convenient way to exchange the mesh.
As the building model was intended to be simplified, I opted for a more minimalist approach to texturing. I utilized a base color map and a normal map to enhance certain areas of the building. For the air conditioner model, I exported the fbx file using ROP FBX Output and imported it into Substance Painter for texturing. Finally, I incorporated an HDRI from Poly Haven to capture reflections from the windows.


