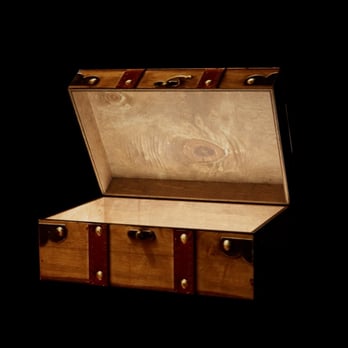
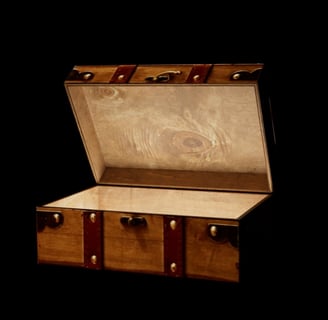
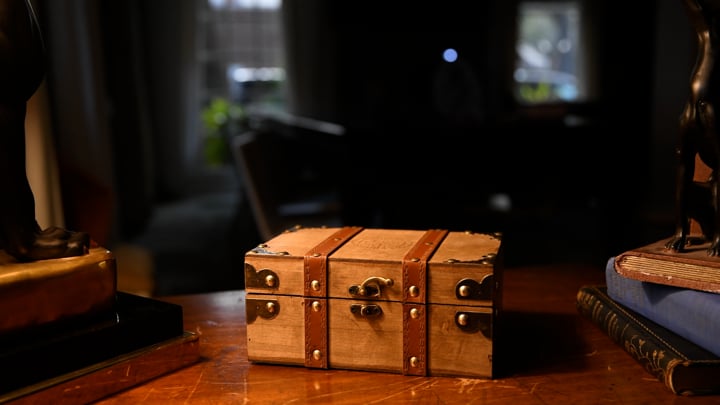
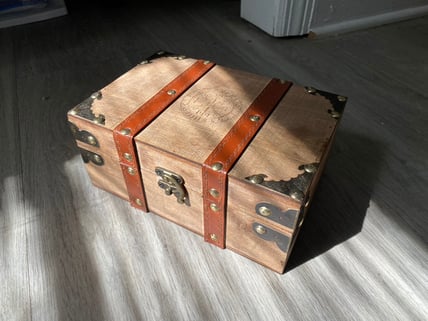
Project 3: Archived Magic Box and Camera Projection
The project involved using camera projections in Maya to extend geometry from a photograph while maintaining texture detail. It also demonstrated how specular and diffuse passes accurately represent object movement through lighting.
TECHNICAL COMPOSITING BLOG
2/19/20248 min read
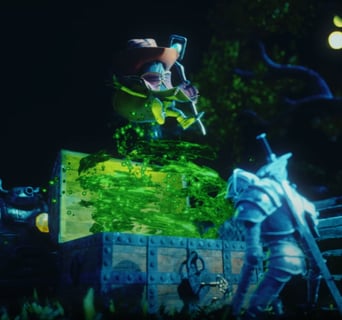
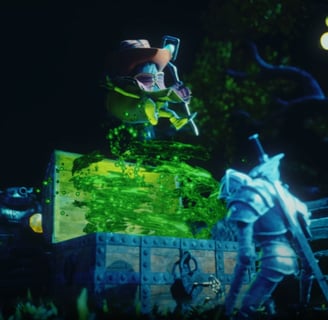
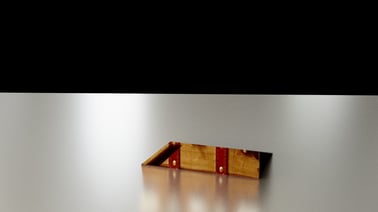
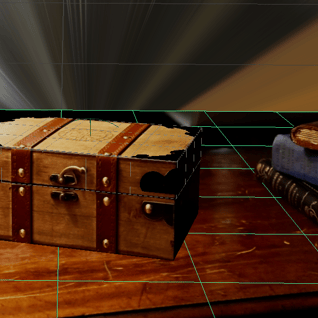
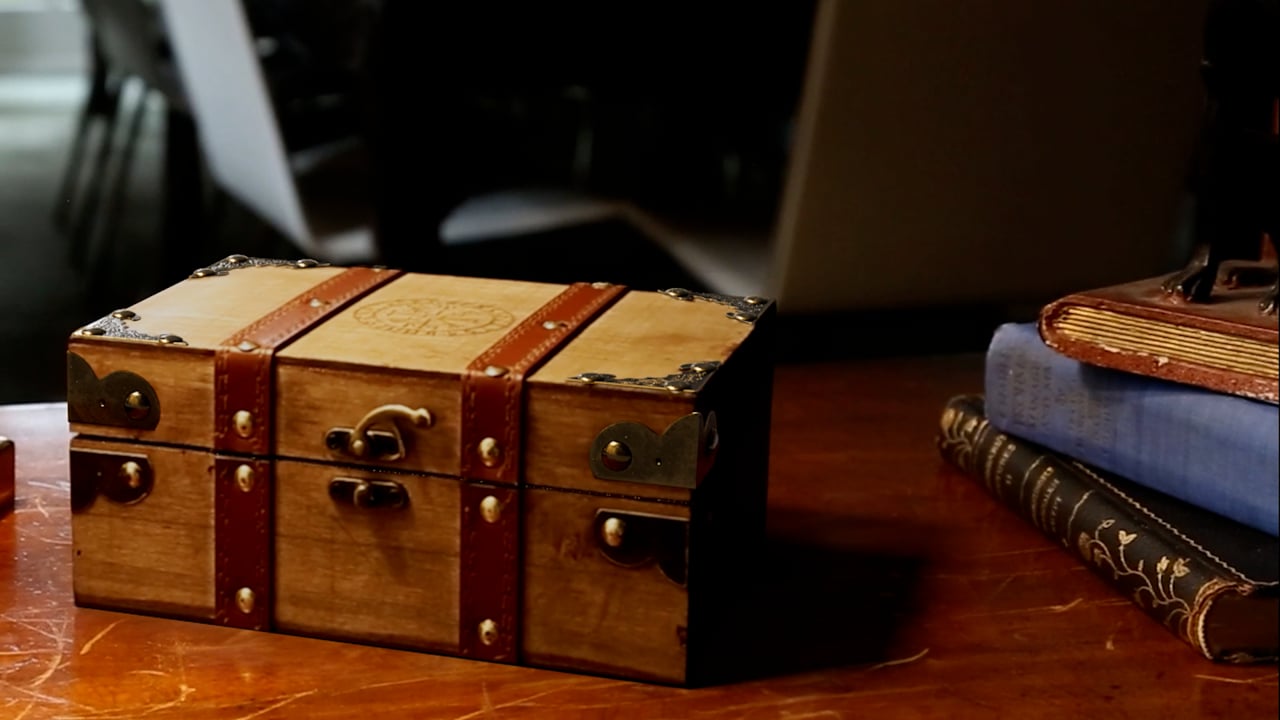
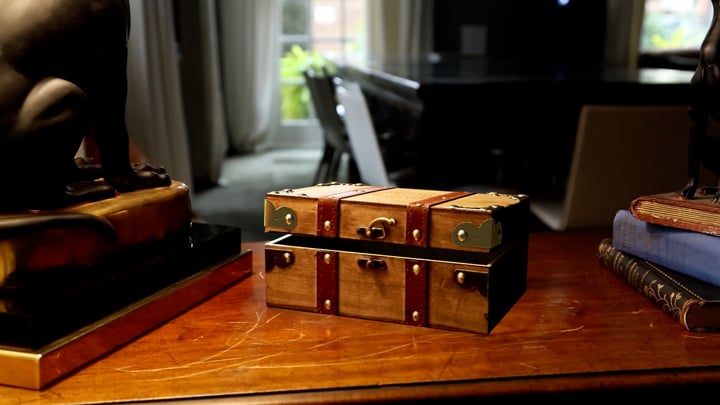
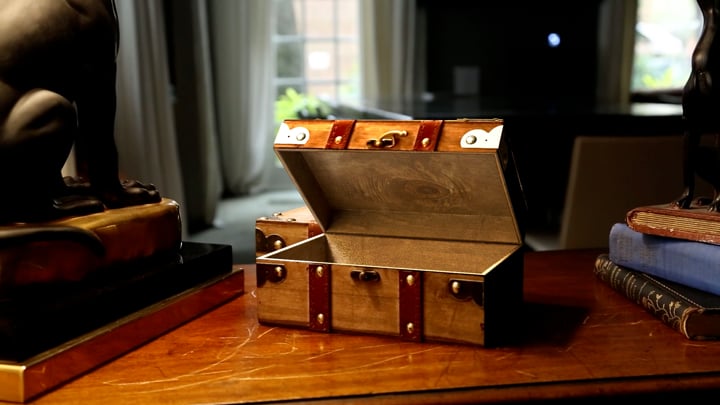
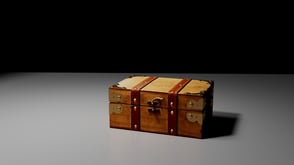
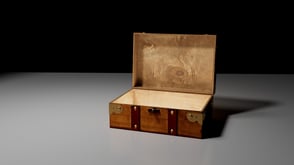
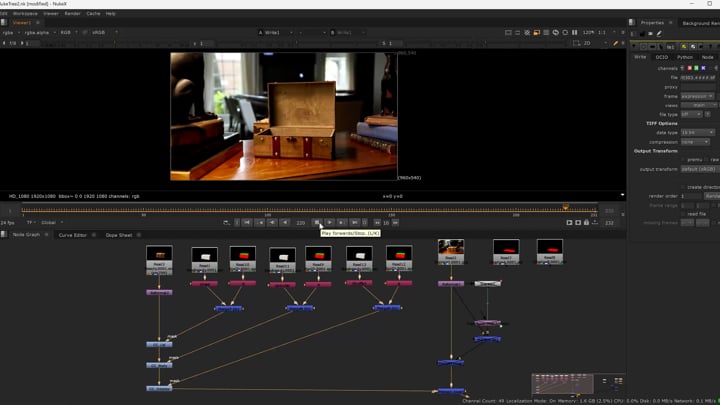
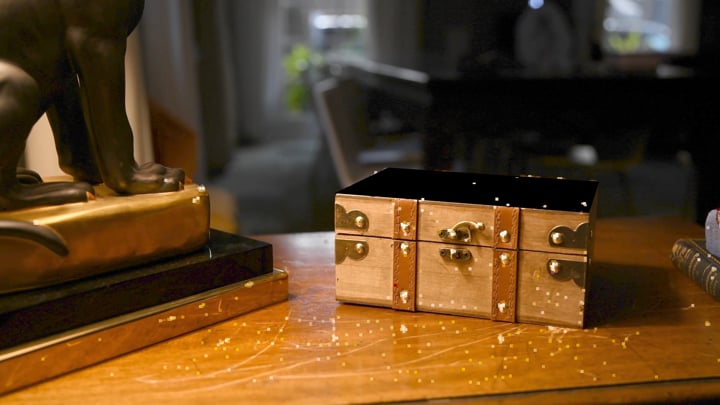
Final Render
Responsible for All Aspects, except the Character
Software / Maya, Nuke, Substance Painter, Photoshop
Renderer / Arnold
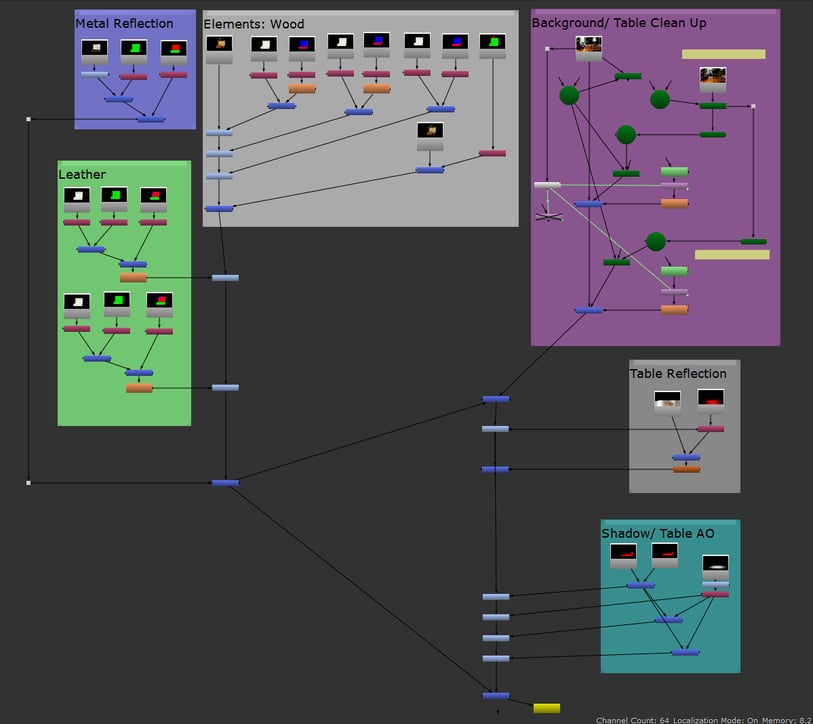
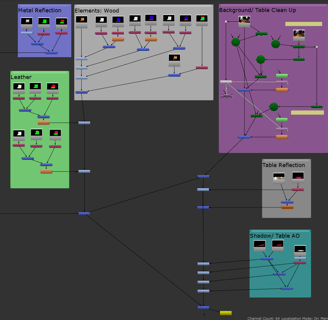
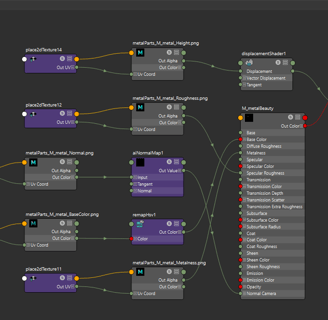
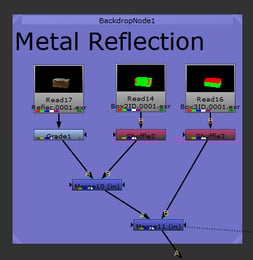
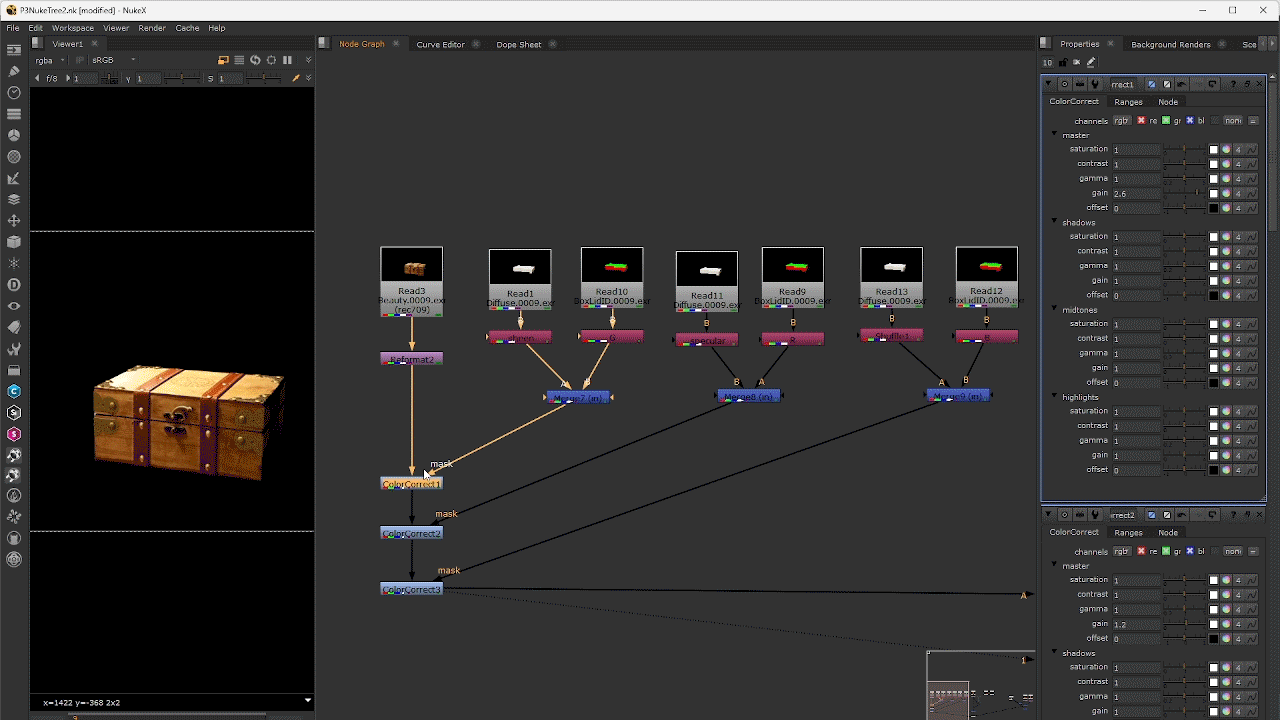
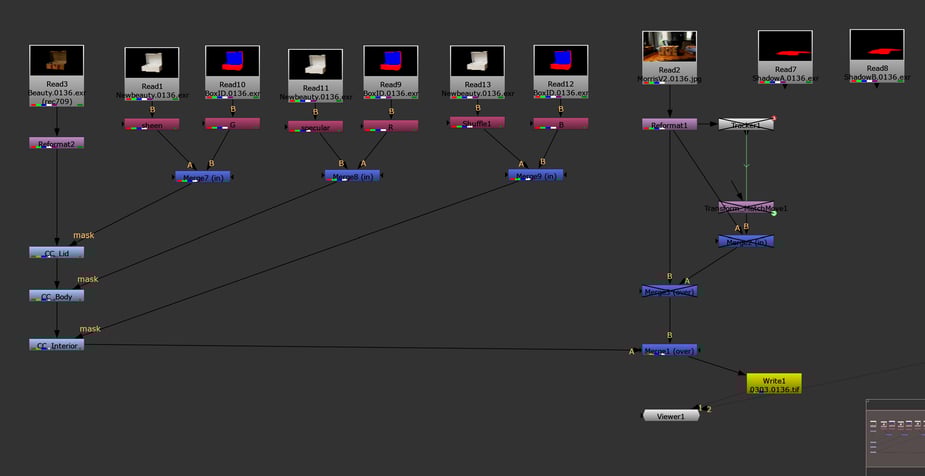
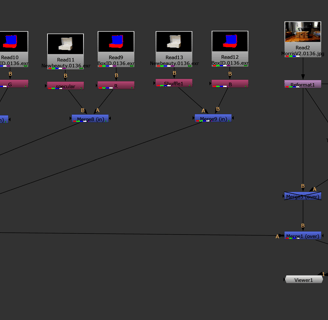
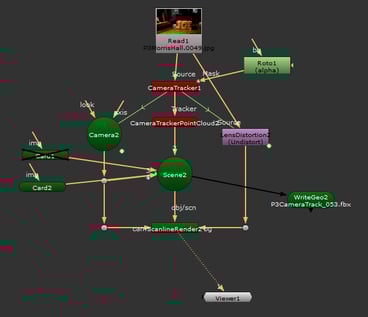
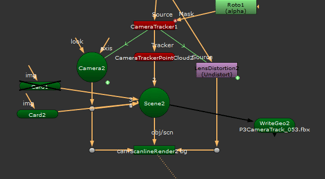
Nuke Tree
Update 6 03/12/2024
Week 10
Revised based on the feedback:
Enhance the contrast of the inner wooden texture.
Address any issues with the clean plate.
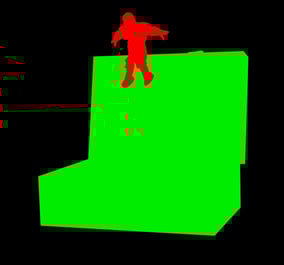
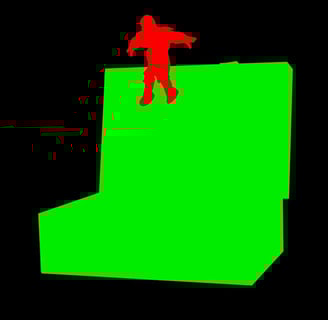
Create separate ID maps for the box and character to resolve the overlap on the character.
Fix the texture projection issue on the right side of the lid.
Increase the sample count for aiAmbientOcclusion to improve quality.
Update 6 03/10/2024
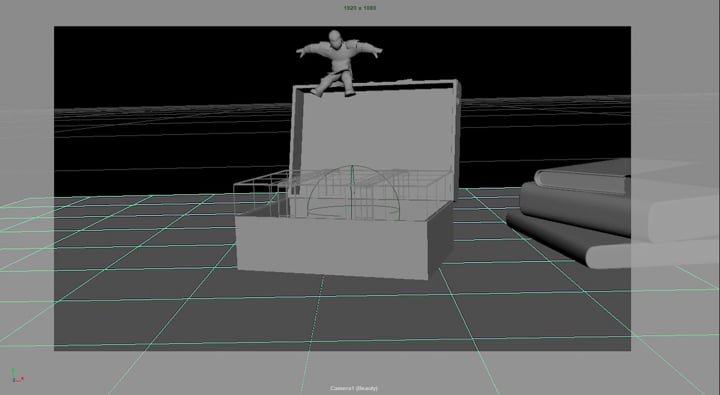
The compositing setup in Nuke is nearly complete; the next step is integrating the character into the scene. Due to time constraints, I opted to use a T-pose character downloaded from Mixamo and applied rough animations.
However, I plan to model the character myself and may seek assistance with animation during the break.
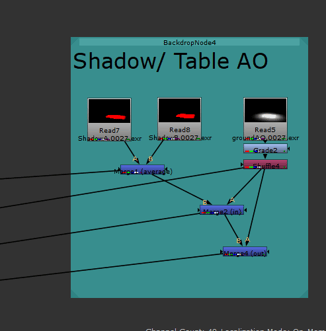
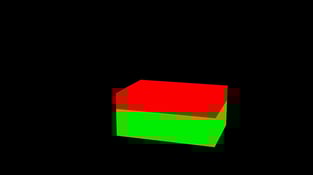
Based on the photo reference, I observed that the wooden table exhibits some reflectivity. To recreate this effect, I implemented two layers: Table Reflection and Table Reflection Mask. In the Table Reflection layer, I included lights, CG objects (set to invisible), and a ground plane with an aiStandardSurfaceShader. I adjusted the roughness and IOR values to match those of a wooden table. Additionally, in the Table Reflection Mask layer, I assigned a SurfaceShader with a red color to objects that would reflect onto the table, making them invisible. For the table itself, I utilized another aiStandardSurfaceShader named 'M_Mirror,' setting the roughness to 0.4 and the IOR to 50.
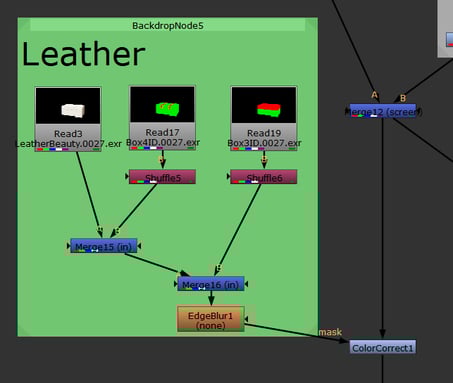
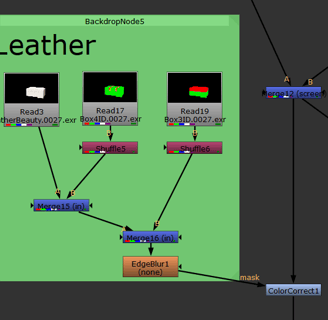
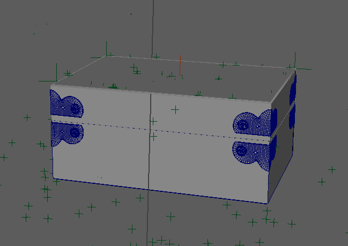
Instead of using a single color to extract the entire object from the ID map of the leather strip, I chose a more nuanced approach. By employing multiple colors, I extracted specific areas such as the front surface and the top surface of the strip separately. This approach allowed for finer control over adjusting the specularity in Nuke, resulting in an enhanced visual quality for the composition.


Update 5 03/09/2024
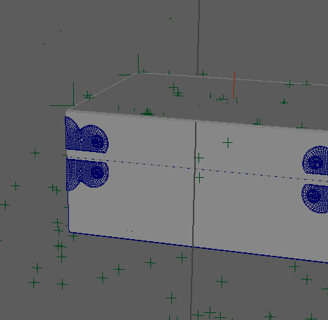
Today, I'm focusing on the hinge and the leather strips of the box. After completing the modeling, my initial plan was to use projection clean-up in Nuke. However, I encountered difficulties matching the perspective and was unsure how to create the clean-up effect when the box is fully open and the hinge disappears. Instead, I opted to use the model to ensure that it covers the flat image from the footage. I struggled with this part for a while because the hinge is a solid piece, making it challenging to cover the surface image seamlessly. Eventually, I managed to force the hinge to fit smoothly against the box.
Update 4 03/08/2024
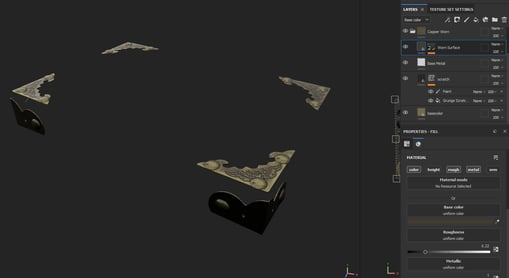
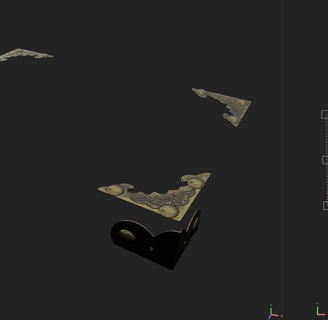
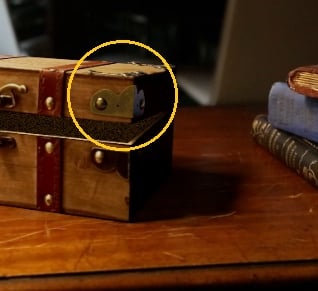
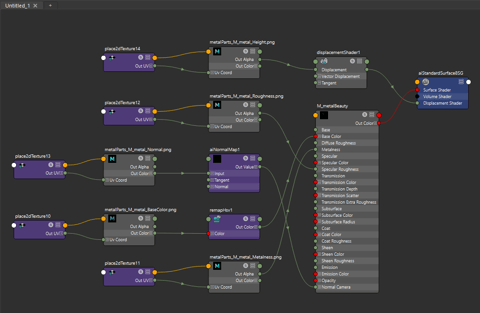
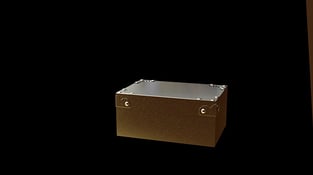
Today, I'm refining the metal components of the CG box. Some pieces have intricate carved patterns, causing variations in reflections when the box is opened. To address this, I'm painting a height map in Photoshop and importing it into Substance Painter to add additional details like dirt, metal oxide, and scratches. Finally, I'll apply these adjustments to the material created in the Beauty layers of Maya.
Next, I modeled a stack of books and aligned them with the perspective near the CG box, allowing the box's shadow to fall on them. Additionally, I projected the texture from the first frame of the sequences onto the books, enabling the metal parts of the box to capture the color from these books.

Update 3 03/07/2024
When the box opened, the left top corner of the box in the footage will expose when the CG box open the lid. To solved this issue, I need multiple clean planes to cover the issue.
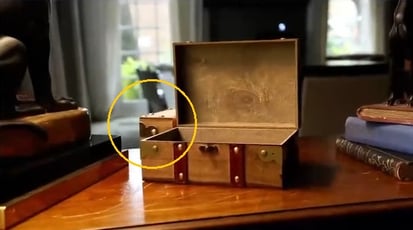
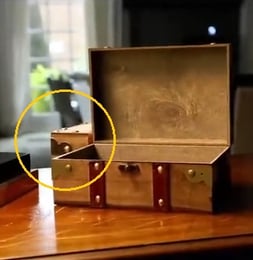
To clean up the background, I require a clean plate to project onto the areas I intend to conceal, including the original box and its shadow. As the clean plate I captured during filming didn't match the perspective of my video, I exported the first frame and imported it into Photoshop to create a suitable clean plate. Utilizing Photoshop's AI generative fill yielded surprisingly excellent results. I utilized this tool to erase the original box and generate the surface of the table, along with the long table and white chair concealed by the original box.
Background/ Shadow Clean Up
Non Clean Up
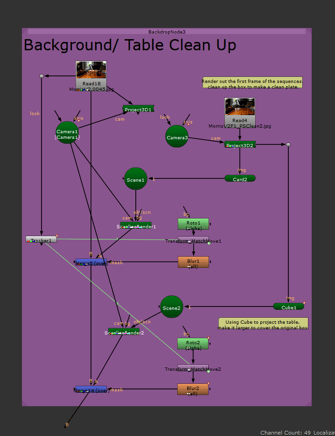
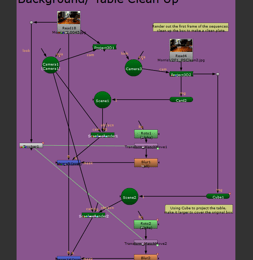
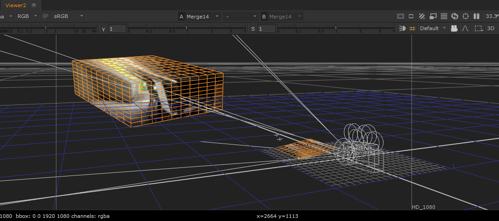
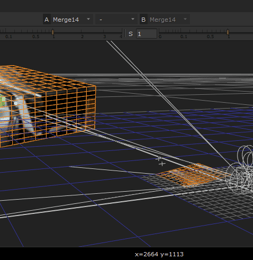
Used cube to match the perspective of the long table
These trackers can assist in aligning the movement of my roto
Update 2 03/06/2024
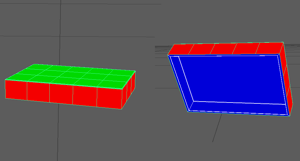
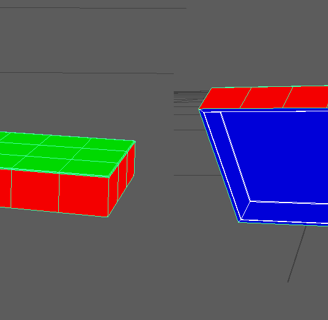
There are some metal parts on the wooden box and it has different reflections compared to wood materials. So I used the ID map method to extract them. So that I can control the metal reflection individually. And add the Grade node in Nuke to adjust the reflectivity.
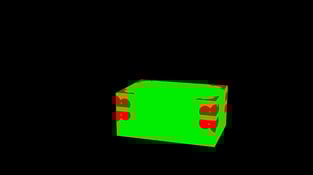
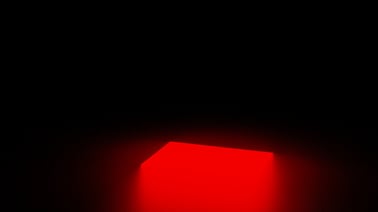
Reflection Box2 ID Box3 ID

Week 9
Update 1 03/05/2024
Set up the key lights and DomeLight. My primary light source emanates from the two light bulbs of the table lamp. However, due to variations in luminance, achieving an exact match with the reference is kind of challenging.


Next, I'm focusing on the lid's various elements to capture the different light reflections when the box is open. I applied an aiStandardSurface shader to the lid, adjusting the color to pure white and fine-tuning the roughness and IOR settings. Additionally, I set up the AOV with diffuse, specular, sheen, N, P, and Z for convenient adjustment of each reflection in Nuke.

Diffuse Specular Sheen
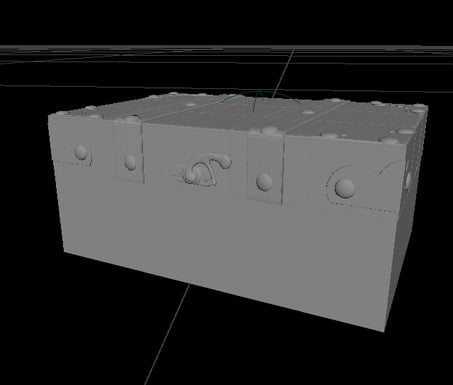
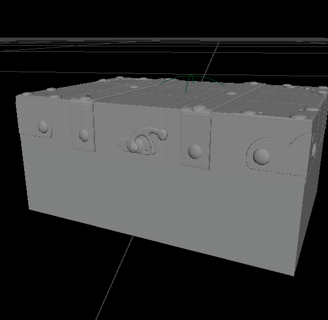
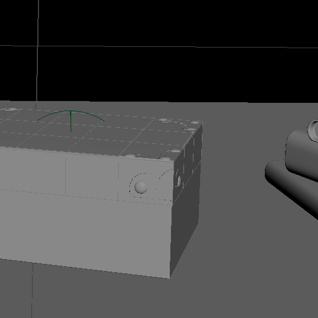
To gain control over each face of the box lid, I used the SurfaceShader to generate the ID map. This allows me to use the Shuffle node to target specific faces for material control.
Update 2 03/03/2024
I reshoot my footage over the weekend because the background of the original photoset was too dark.


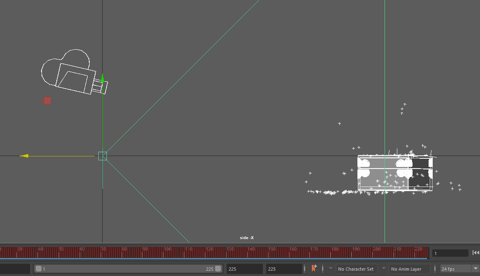
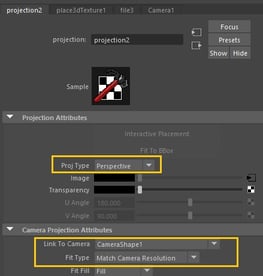
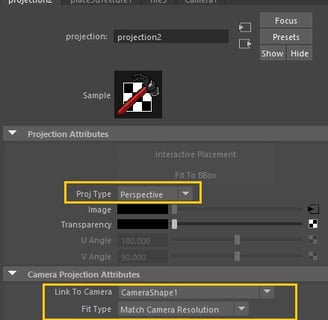
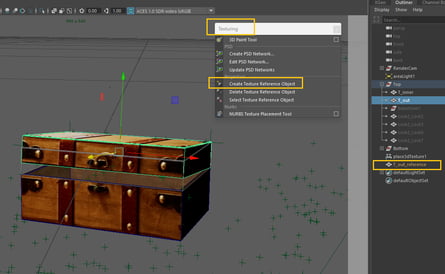
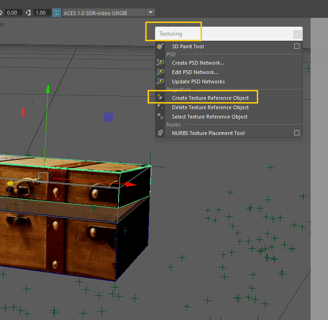
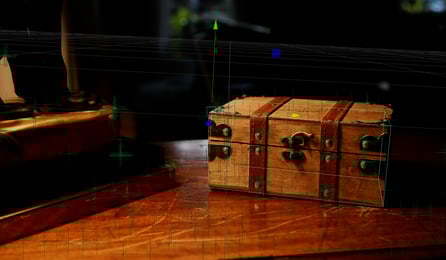
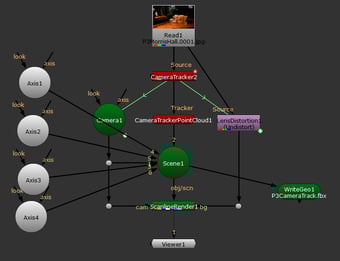
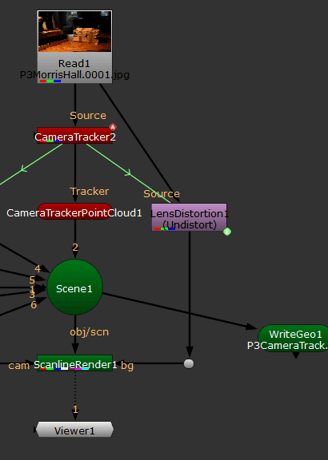
I followed the previous steps to work on the Camera Tracking in Nuke. Due to the handshake in the video, I attempted multiple camera tracking attempts to ensure the card remained positioned on top of the box without sliding. Finally, I was able to bring it into Maya to place the CG box and work on the texture projection. To achieve the same appearance as the real box, I applied a SurfaceShader material to the CG box and used the 'create as project' function to apply the 2D texture file of Out Color. I projected the surface shader based on the RenderCam view, using the first image of the footage sequence as the projection reference. Given that the box will open and the 3D texture projection won't stay fixed on the mesh, utilizing 'Create Texture Reference Object' can prevent texture distortion.

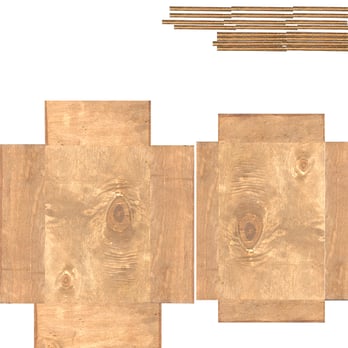
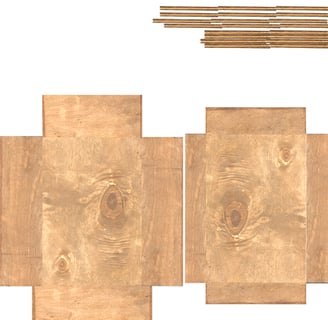
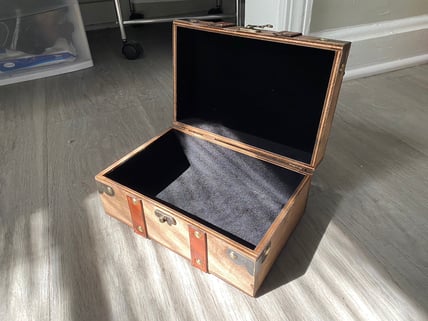
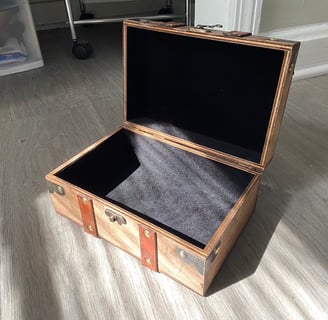
Next, I focused on the interior of the box. I extruded the inner space and applied aiStandardSurface material to those faces. After UV mapping the inner faces, I began working on the texture. To achieve a harmonious appearance, I scanned my real wooden box to abstract the wooden pattern, as I believe this method preserves the overall aesthetic coherence.
I am currently working on the metal components of my box.
Update 3 03/04/2024

Week 8
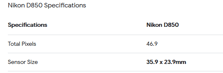
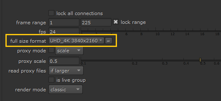
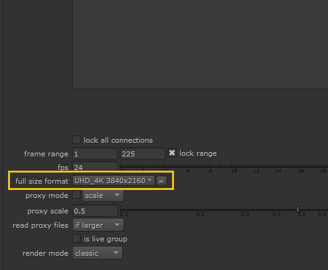
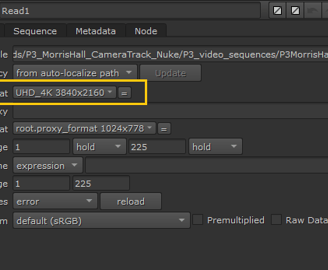
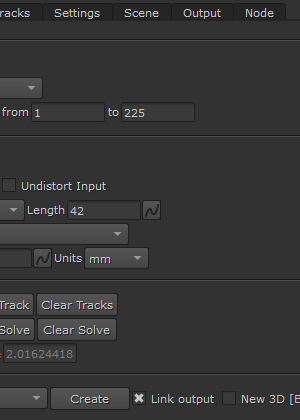
For a more accurate camera track, it's essential to be aware of the sensor size of the camera I used. The camera I used is the Nikon D850, and its sensor size is 35.9 x 23.9mm. Moreover, adjusting the number of features within the range of 600 to 900 facilitates smoother tracking. Additionally, roto the reflective elements and keyframing in the footage aids in tracking accuracy. Since the background is dark, masking out the background is also beneficial. Don't forget to select 'Mask Alpha' in the input settings of the CameraTracker node. Another valuable tip from the tutor is to ensure that the project's full-size format matches the footage sequence.

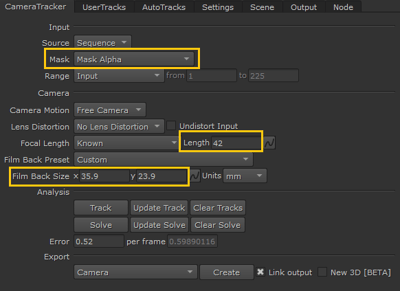
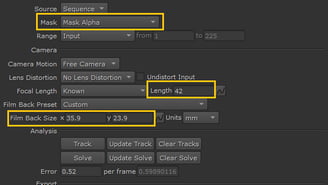

the error lower to 0.52
Update 1 02/27/2024


To reduce errors, I decreased the number of tracking points, which resulted in the loss of the corner ones.
Therefore, I utilized a card to approximate the top of the box.
I did the texture reference test; however, it's not functioning properly in the Renderfarm. As a result, I can only render them locally.
Update 3 02/26/2024

I've begun working on the camera tracking for my footage. I chose the features which position around the box corners and create them as Axis. So that I can recognize the corner of the box in Maya. However, it seems that the photo may be too dark and low quality, as the Slove Error persists above 1 after multiple attempts.
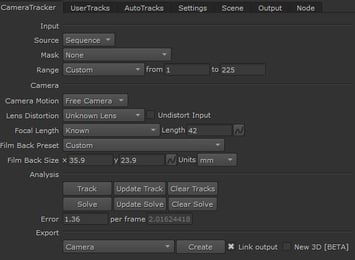
Instead of relying on Nuke's estimation, I input the actual focal length of my image before tracking. However, the error persists and is still not satisfactory.
Update 2 02/26/2024
I researched if there are any places within our SCAD buildings that offer vintage decorations suitable for setting as the background of my vintage wooden box. Pepe Hall, Deloitte Foundry, and Morris Hall are good options for my project. However, since it is Sunday, Pepe Hall and Deloitte Foundry are closed. Fortunately, I found a suitable spot in Morris Hall.
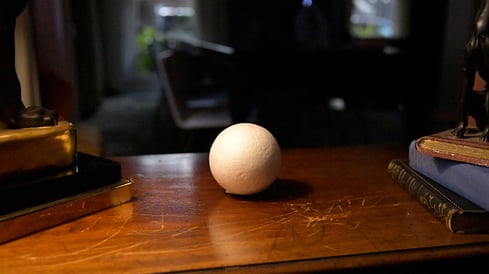
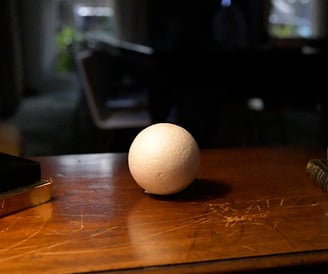
In Project 3, the storytelling will center around the magical wooden box opening to unveil a stylized wizard who appears and floats in the air, with the scene set with a vintage background. I might be looking for some SCAD buildings to shoot my BG plate. My main focus is on integrating a CG character, although if time constraints arise, I may use a tarot card or a key as substitute objects.
Week 7
Update 1 02/19/2024
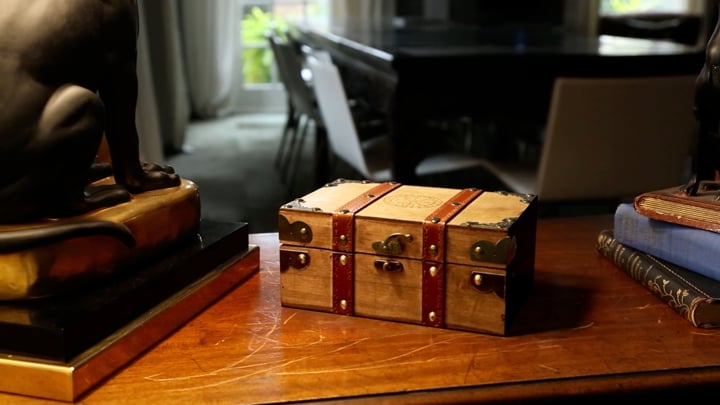
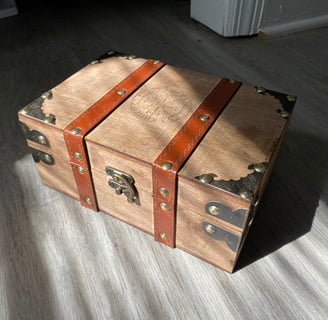
The wooden box I chose and the concept reference.